
How to upload file to OneDrive by Python
Azureアカウントを登録
https://portal.azure.com/#home
OnedriveのAPIを使うために、Azure経由でしないといけないので、先にAzureアカウントを登録する必要がある。
APPを登録
Microsoft entra idにアクセスする
アプリの登録をクリック
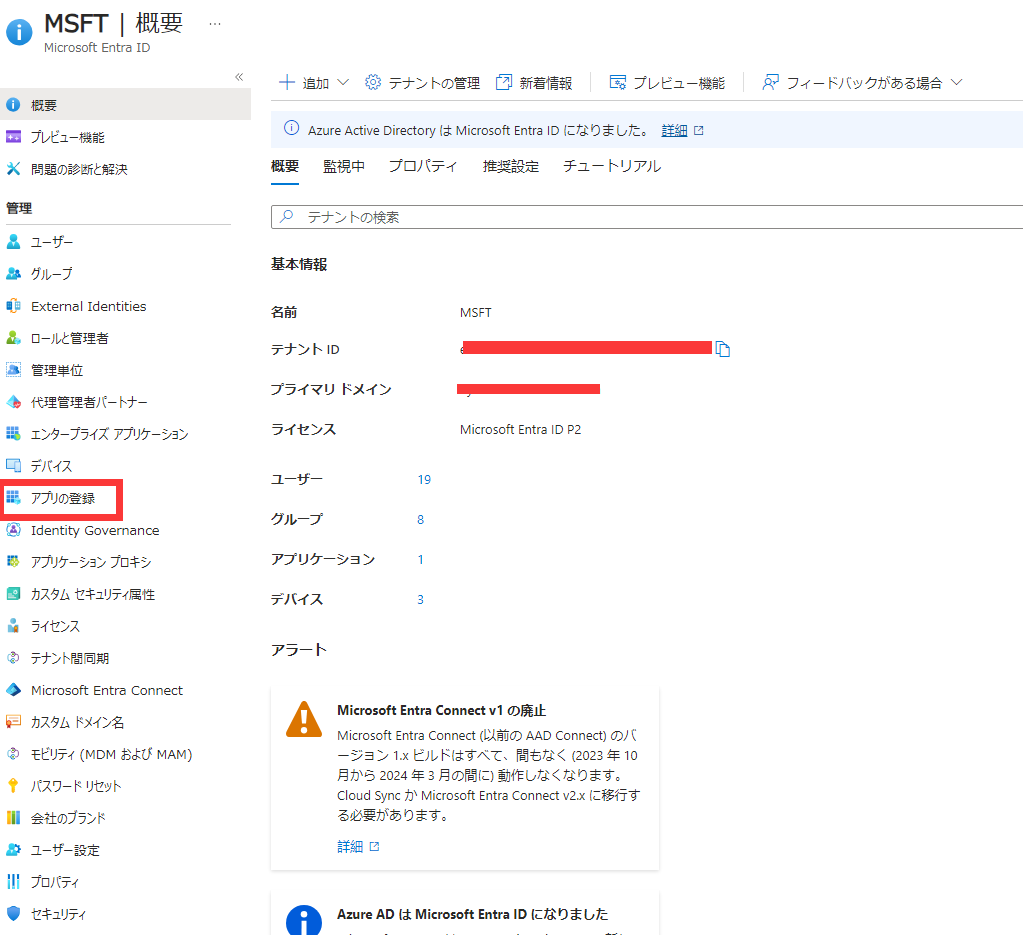
新規登録をクリック
.png)
名前任意
リダイレクトURLは任意
アカウントの種類は3番目を選ぶ
.png)
新規アプリでシークレットを発行
作ったアプリをクリック
.png)
証明書とシークレットをクリック
.png)
新しいクライアントシークレットをクリック
.png)
説明任意、有効期限任意
.png)
発行した後にすぐコピーして保存してください。値は1回だけ出ます。今後再び値を確認する手段がないのため、もう1回シークレットを発行するしかないです。
.png)
scopes発行
APIのアクセス許可⇒アクセス許可追加をクリック
.png)
microsoft graphをクリック
.png)
アプリケーションの許可をクリック
.png)
fileで検索して、Files関連の権限を二つ追加
.png)
追加した後に、管理者の同意を与えます
.png)
状態欄が全部”√”になったら設定が完了
pythonでaccess tokenを取得
変数は以下で取得
client secret
.png)
client id
.png)
scopes
以下をそのまま利用する
[‘Files.Read.All’,’Files.ReadWrite.All’]
Python Code
client_id = ''
client_secret = ''
tebant_id = ''
GRAPH_API_ENDPOINT = 'https://graph.microsoft.com/v1.0'
#自分のメールアドレス
microfost_business_account = ''
#!pip install msal
import msal
import requests
def get_access_token(client_id, client_secret, tenant_id):
    token_url = "https://login.microsoftonline.com/{}/oauth2/token".format(tenant_id)
    token_data = {
        'grant_type': 'client_credentials',
        'client_id': client_id,
        'client_secret': client_secret,
        'resource': 'https://graph.microsoft.com'
    }
    response = requests.post(token_url, data=token_data)
    return response.json().get('access_token')
#ローカルのファイルパス
file_path = '/content/sample_data/california_housing_test.csv'
file_name = os.path.basename(file_path)
with open(file_path,'rb') as upload:
  csv_content = upload.read()
access_token = get_access_token(client_id, client_secret, tenant_id)
headers = {
    'Authorization' : 'Bearer ' + access_token
}
response = requests.put(
    GRAPH_API_ENDPOINT +  f'/users/{microfost_business_account}/drive/items/root:/{file_name}:/content',
    headers = headers,
    data = csv_content
)
response.json()